
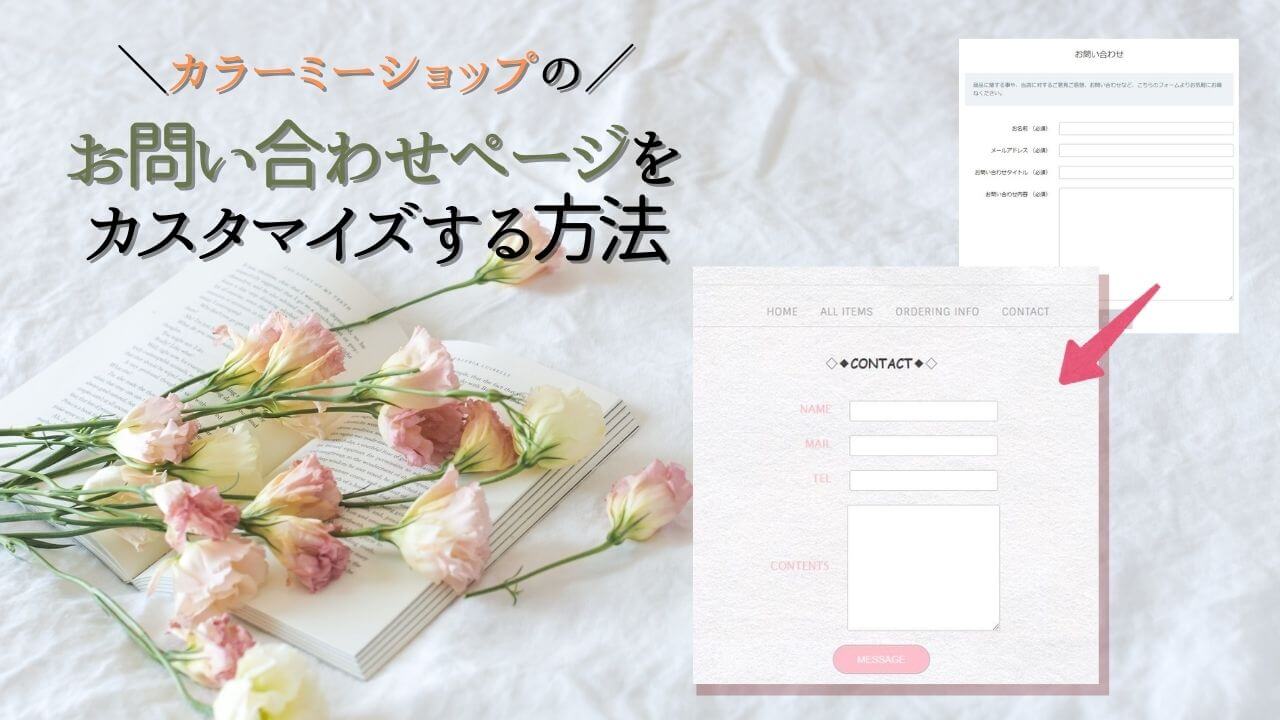
先日、カラーミーショップ![]() でネットショップを作成する案件で、デザインのカスタマイズを担当しました。
でネットショップを作成する案件で、デザインのカスタマイズを担当しました。
カラーミーショップはとてもカスタマイズの自由度が高く、同じくネットショップを作成できるBASEではできない「フリーページ」の作成が可能!
なので、結構自由にカスタマイズすることができちゃいます。
が、しかし!
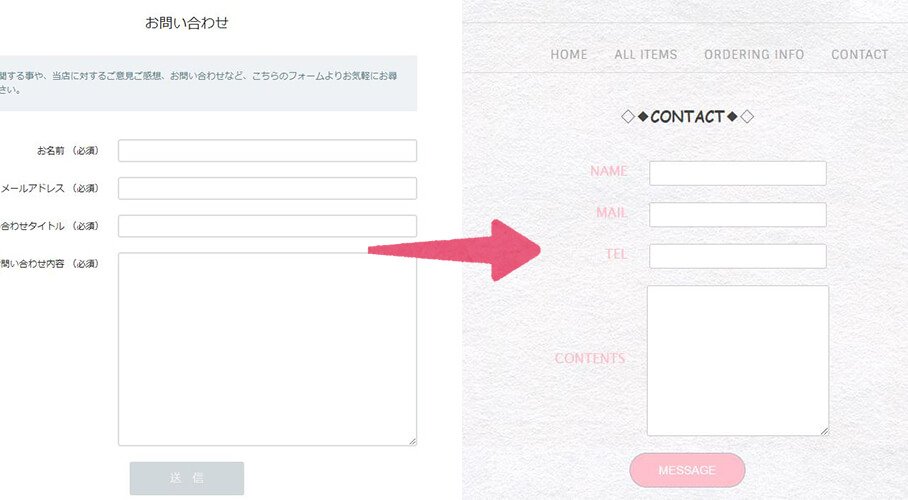
お問い合わせページのカスタマイズには大きく3つの問題がありました。
そこで今回はフリーページを利用することで、上記の問題を解決しながらお問い合わせページを作成しました。
こんな感じで解決⬇️
ちなみに・・
カラーミーショップ![]() のデザインカスタマイズは既存のテーマを基盤にして行います。
のデザインカスタマイズは既存のテーマを基盤にして行います。
既存テーマのHTML記述をバックアップとして残しつつ、別途HTML・CSS編集する方法はこちらの記事に詳しく載せているので参考にしてみてください⬇️
お問い合わせページのカスタマイズ方法
では、さっそくフリーページを利用してお問い合わせページの作成をしていきます。
手順としては下記の3ステップです⬇️
❶問い合わせページのHTMLを記述
まずは、フリーページを新規作成して、お問い合わせページのHTMLを記述しましょう。
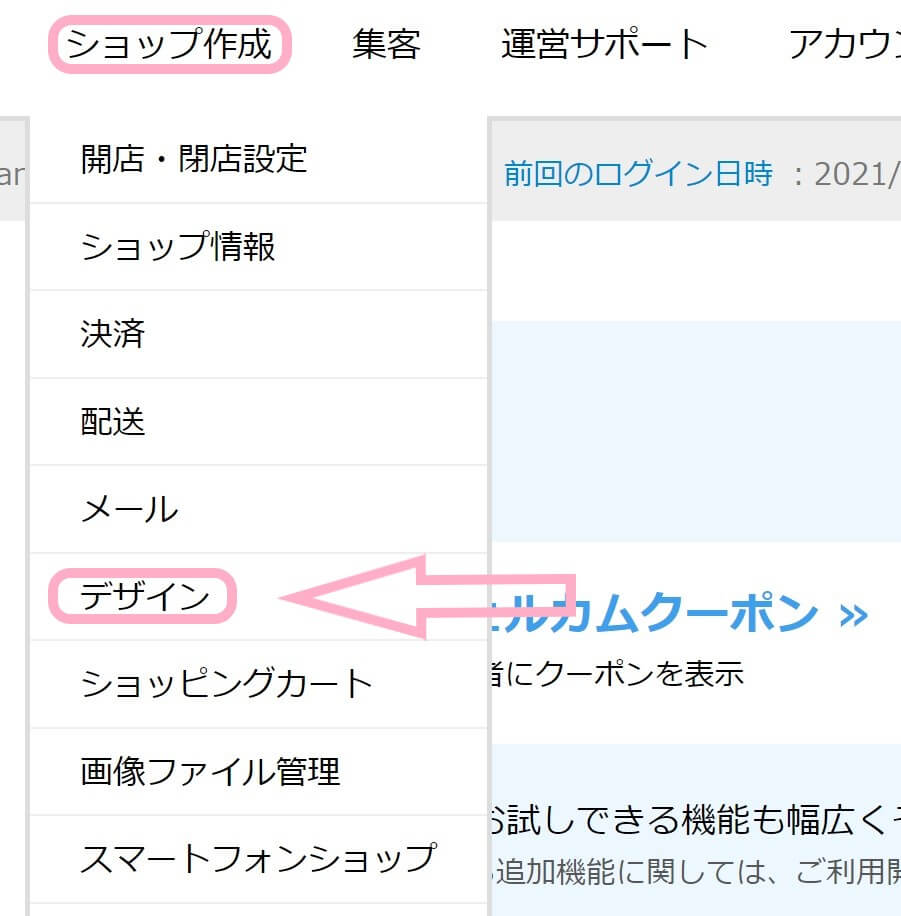
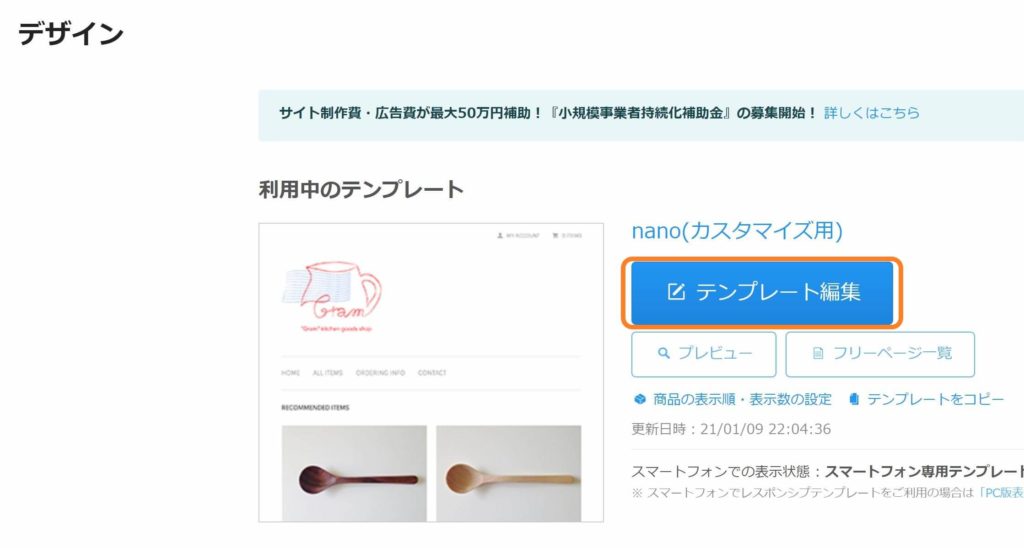
1.カラーミーショップ![]() にログイン後、左上メニューから「ショップ作成」→「デザイン」をクリックします。
にログイン後、左上メニューから「ショップ作成」→「デザイン」をクリックします。
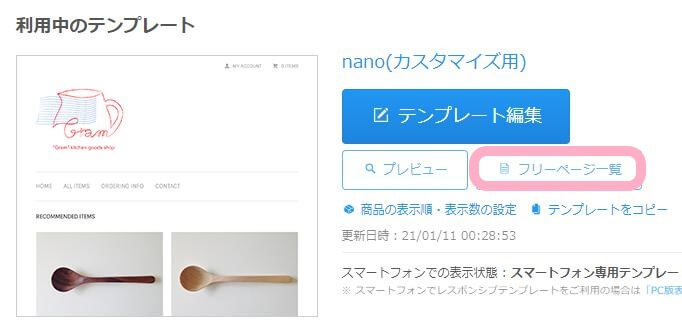
2.任意のテーマから「フリーページ一覧」をクリックします。
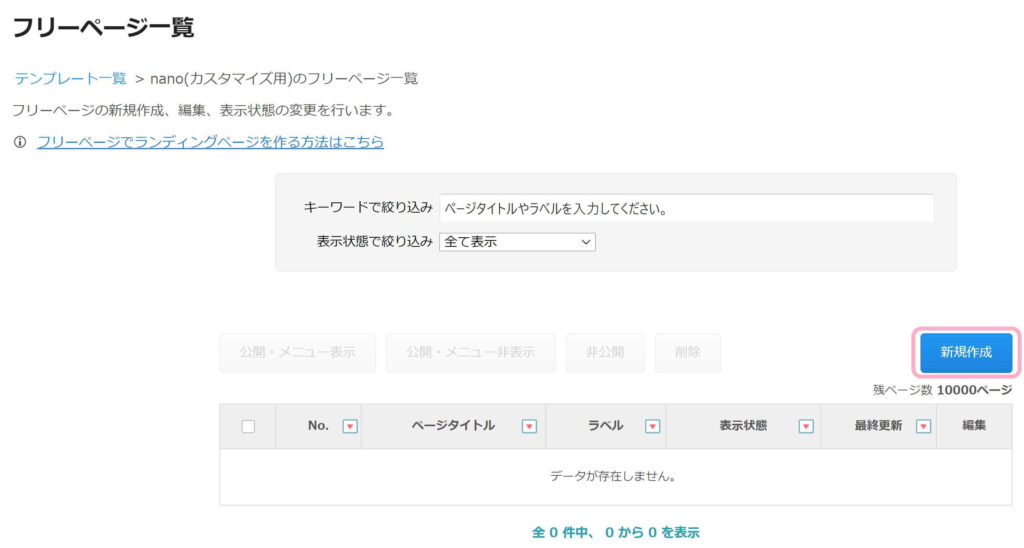
3.右側の「新規作成」をクリックします。
4.下図を参考にお問い合わせページの内容を入力していきます。
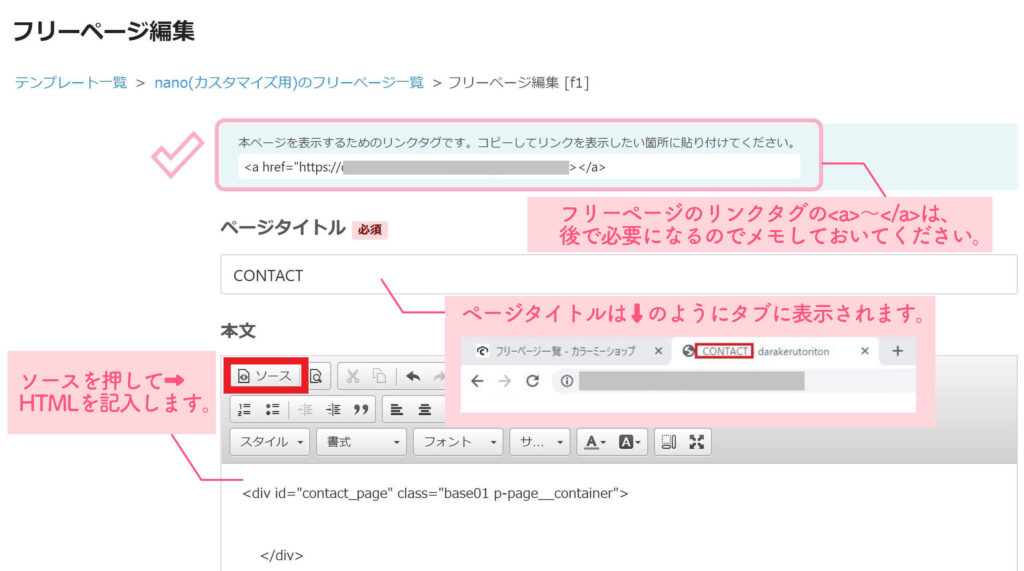
⬇️最初の<script>~</script>でメーラー起動・フォーム入力内容を取得という処理をしています。
<div id="Contact">
    <script type="text/javascript">
        function inq_send() {
          if(confirm ("以下の内容をメールに添付いたします。よろしいですか?")) {
            //document.frm.submit();
           var name = $(".form_txt");
           console.log(name[0].value);
           console.log(location.href);
           location.href = "mailto:【送信先のメールアドレス】?subject=お問い合わせ&body=" + name[0].value + "%0d%0a" + name[1].value + "%0d%0a" + name[2].value + "%0d%0a" + name[3].value;
          }
        }
    </script>
    <h2>◇◆CONTACT◆◇</h2>

    <form class="form" accept-charset="euc-jp" name="frm" method="post" enctype="multipart/form-data" action="mailto:toriton.tori2020@gmail.com">
        <div>
            <label class="form_ttl" type="text" name="name">NAME</label>
            <input class="form_txt" type="text" name="name" required />
        </div>
        <div>
            <label class="form_ttl" type="text" name="email">MAIL</label>
            <input class="form_txt" type="email" name="email" required />
        </div>
        <div>
            <label class="form_ttl" type="tel" name="tel">TEL</label>
            <input class="form_txt" type="tel" name="tel" />
        </div>
        <div>
            <label class="form_ttl" type="text" name="comment">CONTENTS</label>
            <textarea class="form_txt text_cntents" name="comment"></textarea>
        </div>
        <div class="form_send">
            <input class="form_btn" onclick="inq_send();" type="button" value="MESSAGE"/>
        </div>
    </form>
</div>
5.下の設定は特に必要ないので、そのまま「保存」でOKです!

❷リンク先にフリーページを指定
次に、既存のお問い合わせページへのリンクを先程追加したページに変更していきます。
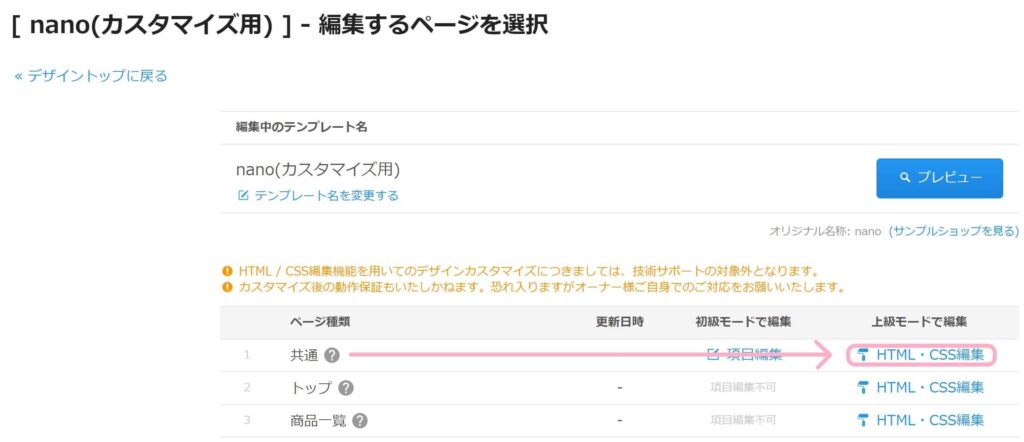
1.任意のテーマから「テンプレート編集」をクリックします。
2.共通の「HTML・CSS編集」をクリックします。
3.既存のHTMLからCtrl+Fで【{$view_inq_url}】を検索して、<a>~</a>の中をメモしておいたフリーページのリンクタグに書き換えます。
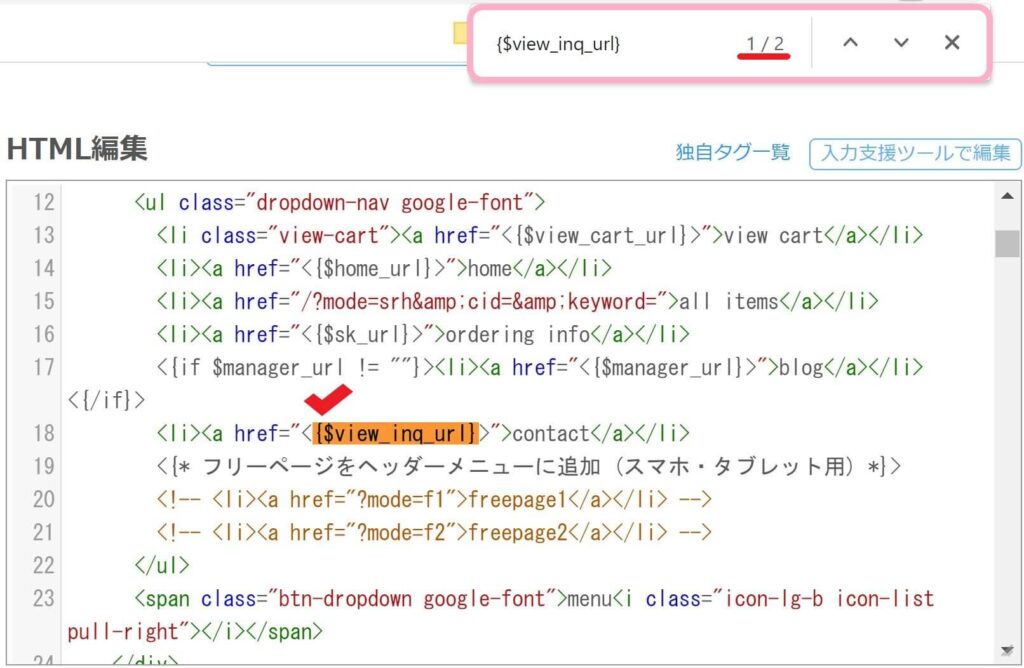
こんな感じです。
<a href="<{$view_inq_url}>">contact</a>
⬇️
<a href="https://【お問い合わせページのURL】">contact</a>
今回利用したテーマは2箇所あったので、検索して全て書き換えてくださいね!
❸問い合わせページのCSSを記述
最後に、お問い合わせページのスタイルを記述していきます。
1.既存のCSSの一番したに記述します。
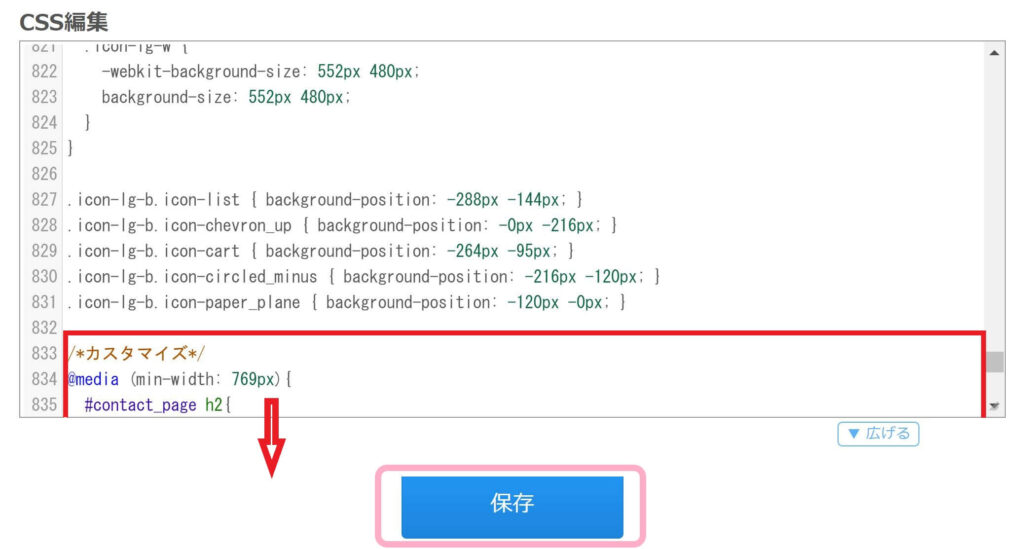
⬇️コピペ用にデモのCSSを載せておきますね!
#Contact h2{
  text-align: center;
  font-size: 18px;
  margin: 10px 0;
}

#Contact .c-form__item{
  display: flex;
  justify-content: center;
  align-items: center;
}

#Contact .c-form__title{
  color: pink;
  font-size: 16px;
  padding-right: 12px;
  width: 100px;
  text-align: right;
}

#Contact .c-input--text{
  margin: 10px;
  width: 200px;
}

#Contact .c-button{
  background-color: pink;
  color: #fff;
  border: 1px solid #b6bac9;
  border-radius: 30px;
  padding: 10px 0;
  width: 140px;
  font-size: 14px;
}

#Contact .g-recaptcha{
  text-align: -webkit-right;
  margin-right: 35.5vw;
}

.send{
  width: 100%;
  text-align: center;
  margin: 10px 0;
}
まとめ

今回はサンプルなので結構シンプルなお問い合わせページにしましたが、HTMLもCSSも書けるので自由自在にお問い合わせページを作成することができます!
ただ、PHPが使えないのでそのまま送信までもっていけず、メーラーを起動させて送信という形なので、既存のコンタクトフォームを利用する方がユーザーには使いやすいかなと思います・・w
どうしても、ヘッダーフッターを出したい・デザインを統一させたいという方は試してみてください♪
当ブログは、カラーミーショップ
![]() などのデザインカスタマイズの方法を紹介していますが、直接のご依頼も受け付けています♪
などのデザインカスタマイズの方法を紹介していますが、直接のご依頼も受け付けています♪
こういうデザインにしたい!
試してみたけどできなかった・・
などの簡単な修正でしたらワンコインから受け付けていますので、TwitterのDMかお問い合わせフォームよりお気軽にご連絡ください^^
ぜひやってみてください〜
最後まで読んでいただきありがとうございました!